1. How to install PDF Maker
Please provide following steps in order to install PDF Maker
-
Install the .zip (package) file of the PDF Maker module via CRM Settings -> Module Manager. Click on the Install from Zip.

Picture 1.1 Installation of PDF Maker in Vtiger 6 – step 1
-
Select the .zip (package) file that you downloaded from our shop. Please check that you accepted the disclaimer and would like to proceed. Click on the [Import] button.

Picture 1.2 Installation of PDF Maker in Vtiger 6 – step 2
Note: If you have after this step error message: Sorry! Attempt to access restricted file. Please check if folder test/vlib has correct write permission for browser (apache, www-data).
Verify the import details parsed from the .zip (package) file. Please check that you accepted the license agreement and click [Import Now] to proceed or [Cancel] to cancel. .

-
Click on [Ok] to complete the module import.

Picture 1.4 Installation of PDF Maker in Vtiger 6 – step 4
Picture 1.3 Installation of PDF Maker in Vtiger 6 – step 3
In order to finish installation, please provide following validation steps.
-
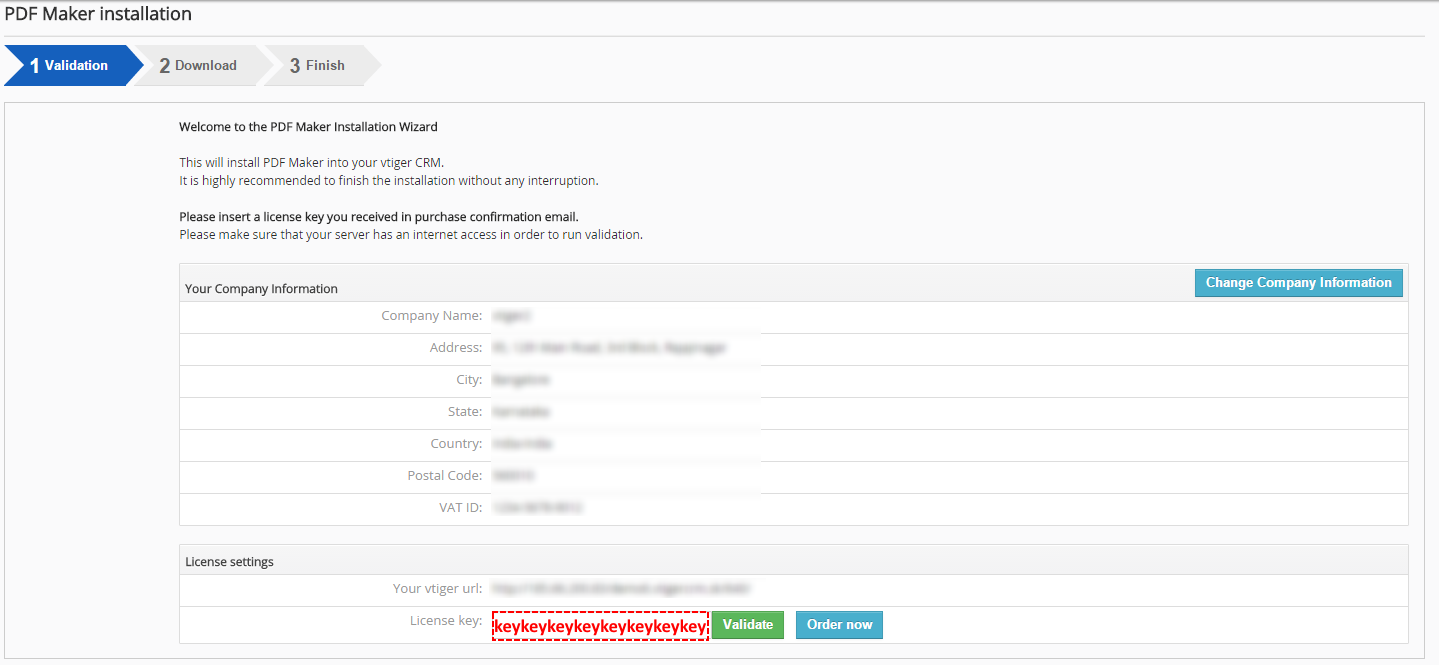
PDF Maker Validation Step. Please check your Company information and insert license key. Make sure that your server has Internet access. Click on button [Validate]. If you want to change your Company information, click on button [Change Company Information].

Picture 1.5 Validation PDF Maker in CRM step 1
-
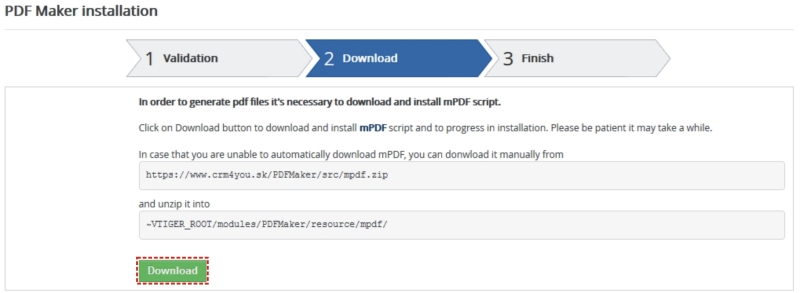
PDF Maker Download. Click on [Download] button to download and install mpdf script.

Picture 1.6 Validation PDF Maker in CRM step 2
-
If PDF Maker is installed successfully you will see following screen. Click on [Finish].

Picture 1.7 Validation PDF Maker in CRM step 3


